Maintaining the appearance of your vehicle is essential for both aesthetic and financial reasons. One of the most common issues faced by car owners is damage inflicted by rock chips and scratches on the paint surface. These blemishes not only detract from the overall look of your vehicle but can also expose metal surfaces to corrosion and rust if left unattended.
Understanding how to effectively repair rock chips and paint damage can save you time and money over the long term. Not only does prompt repair prevent further deterioration, but it also helps retain the vehicle’s resale value. In this article, we will delve into the essential steps for assessing the damage, selecting the right materials, and executing a successful repair process.
Whether you are a DIY enthusiast or someone looking to learn more about vehicle maintenance, this guide will provide you with practical solutions to keep your car looking its best. By investing a little effort into repairing these common types of damage, you can enjoy a more polished appearance and extend the life of your vehicle’s paint job.
Identifying the Type and Extent of Damage

When it comes to repairing rock chips and paint damage on your vehicle, the first step is identifying the type and extent of the damage. This is crucial for determining the appropriate repair methods and materials needed. Damage can generally be classified into several categories: surface scratches, deep scratches, and paint chips.
Surface scratches are the most common and affect only the clear coat layer, often visible as light scuffs or marks. These can usually be polished out easily without the need for extensive repair. Deep scratches, on the other hand, penetrate through the clear coat and into the paint layer. They may expose the primer or even bare metal, requiring more comprehensive repair solutions.
Paint chips occur when small pieces of paint are missing due to impacts, often from road debris. These are typically circular and can sometimes lead to rust formation if not addressed promptly. Assessing the depth and size of paint chips is essential as larger, deeper chips may require a professional touch, while smaller ones might be manageable with DIY solutions.
To accurately assess the damage, closely examine the affected area under different lighting conditions. This can help reveal the true extent of scratches or chips. It’s also useful to run your fingernail over the damage; if it catches, the scratch is likely too deep for simple polishing.
Consider whether the damage has compromised any underlying layers such as primer or metal, as this will influence repair techniques. Take note of any paint discoloration around the damaged area, as this may indicate chemical damage or fading that needs to be addressed during repairs.
Finally, document the damage by taking clear photographs that can help you track the condition of your vehicle over time. This information will guide you in selecting the right repair products, whether it be touch-up paint, scratch remover, or even professional services.
Step-by-Step Guide to Repairing Paint Chips
Repairing paint chips on your vehicle is essential to maintain its appearance and prevent rust. Follow this step-by-step guide for effective repairs.
Step 1: Gather Supplies
Before starting, collect necessary materials: automotive touch-up paint, clear coat, primer, a fine brush or pen, sandpaper (400 and 2000 grit), rubbing compound, masking tape, and lint-free cloths.
Step 2: Clean the Area
Use soap and water to thoroughly wash the affected area. Dry it with a lint-free cloth to ensure no dirt or grease remains, allowing for better adhesion of the paint.
Step 3: Assess the Damage
Inspect the paint chips closely. If there’s any rust present, it’s crucial to remove it. Use sandpaper to gently sand the affected area until smooth, ensuring you don’t damage the surrounding paint.
Step 4: Apply Primer
If the chip is deep and exposes metal, apply a small amount of primer with a fine brush. Allow it to dry completely as per the manufacturer’s instructions before proceeding.
Step 5: Apply Touch-Up Paint
Shake the touch-up paint well. Using a fine brush or applicator, carefully apply the paint to the chip. Make sure to fill in the chip completely, and avoid overfilling. Let it dry as directed.
Step 6: Apply Clear Coat
Once the touch-up paint has dried, apply a thin layer of clear coat to seal the repair and match the gloss of the surrounding paint. Use the fine brush for precision, and let it dry thoroughly.
Step 7: Sand and Polish
For a seamless finish, lightly sand the repaired area with 2000 grit sandpaper after the clear coat has cured. This will blend the repaired section with the original paint. Follow up with rubbing compound to polish the area, restoring the shine.
Step 8: Final Clean-Up
Wipe the area with a clean, lint-free cloth to remove any dust or residue. Inspect your work to ensure the paint chip is well repaired and blends with the vehicle’s surface.
By following these steps, you can effectively repair paint chips and extend the life of your vehicle’s exterior, ensuring it remains visually appealing.
Choosing the Right Products and Tools for DIY Repairs

When embarking on a DIY project to repair rock chips and paint damage on your vehicle, selecting the right products and tools is crucial for achieving a professional finish. Here are the key factors to consider:
1. Paint Type: The type of paint you choose should match your vehicle’s original paint code. Most manufacturers offer touch-up paints designed specifically for their vehicles. Ensure that the paint is compatible with your vehicle’s paint system, whether it be metallic, matte, or clear-coated.
2. Clear Coat: After applying touch-up paint, a quality clear coat is essential to protect the repair and restore gloss. Look for a clear coat that matches the finish of your vehicle’s surface.
3. Application Tools: Use fine-tipped brushes, applicators, or paint pens for precise application. Avoid using standard paint brushes, as they can leave visible brush strokes. Additionally, having soft cloths or microfiber towels on hand will help in clean-up and polishing your repairs.
4. Sanding Tools: For deeper chips that require leveling, fine-grit sandpaper (around 2000-3000 grit) and a sanding block are essential. This allows for a smooth transition between the repaired area and the surrounding paint, minimizing the visibility of the repair.
5. Primer: If the repair exposes bare metal or plastic, a good primer is necessary to ensure adhesion and prevent rust. Choose a primer compatible with both the paint and the material of the vehicle.
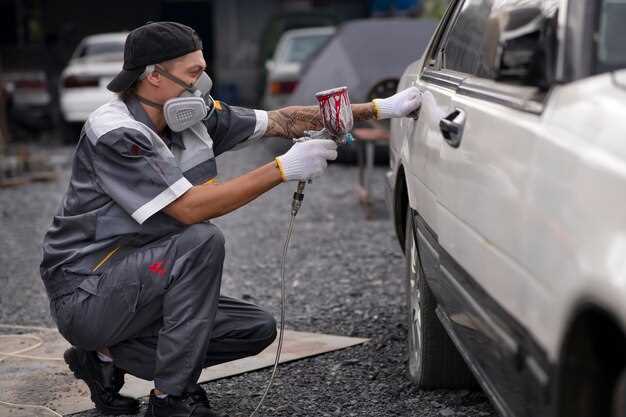
6. Protective Gear: Safety should never be overlooked. Use gloves to protect your hands from harmful chemicals and a mask to avoid inhaling fumes while working with paints and solvents.
7. Cleaners and Degreasers: To ensure proper adhesion of the paint, it’s vital to start with a clean surface. Use a quality automotive cleanser or degreaser to remove dirt, grease, and old wax from the area being repaired.
8. Finishing Products: Depending on the severity of the damage, you may consider rubbing compounds and polishes to restore shine to the repaired area, blending it seamlessly with the surrounding paint.
By choosing the right products and tools tailored to your specific repair requirements, you can ensure a successful DIY repair that enhances the longevity and appearance of your vehicle.


